IPv4 vs IPv6
Before we dive into validation, let’s quickly talk about the two types of IP addresses you’ll come across. For the purposes of this tutorial, we’ll focus on analyzing and using IPv4 addresses, since that’s still the most commonly used and understood format.
IPv4
The IP addresses you’re probably familiar with are the IPv4 version addresses. An IPv4 address looks like a four-part string of numbers separated by periods:
Each number in the four-part string can range from 0 to 255, and is an 8-bit field that represents one byte of the IP address. This makes the complete IP a 32-bit (4 x 8 bits) address space, which provides enough combinations for 4.3 billion unique addresses.
IPv6
IPv6 is a new format of IP address that looks slightly different from IPv4. An IPv6 address looks like this:
Note that it uses a combination of alphanumeric characters, and has twice the number of available spaces that an IPv4 address has. It is a 128-bit address space and allows for a lot more unique address combinations. Whereas IPv4 allows for 4.3 billion unique addresses, IPv6 provides enough space for 2^128 unique addresses. That’s 1028 times as many addresses as IPv4!
Why Do We Need IPv6?
Even though IPv4 is called “version 4” it is actually the first version of IP ever created and has been around since the invention of the internet. Back in those days, engineers couldn’t have imagined that 4.3 billion unique addresses wouldn’t be enough to handle our needs—but here we are in 2023 with about 4.29 billion addresses already used up by various smartphones, laptops, and tablets.
IPv6 provides enough space that we should theoretically never run out of space for new addresses.
How to Validate IP Address in Python
In this tutorial, we’ll cover a couple of the easiest ways to determine that an IP address is valid using Python. We’ll also learn how to use a valid IP address to determine the user’s location using the AbstractAPI IP Geolocation API.
Validate an IP Address Using the Python ipaddress() module
Python ships with a handy module called ipaddress that can be used to parse IP addresses, tell you their type and other information about them, and perform basic arithmetic on IP addresses. It does not tell you explicitly that an address is a valid IP address, but with some custom logic we can use it as such.
This is the most robust and secure way of validating an IP address in Python. The module supports both IPv4 and IPv6 addresses.
To use the ipaddress module, first import it into your Python code.
Next, call the .ip_address() method on the ipaddress class, passing it an IP string.
If the IP string passed is a valid IPv4 address or valid IPv6 address, the ipaddress module will use the string to create a new IP address object. If the string passed is not a valid IP address, the ipaddress module will throw a value error. Let’s run the code above with an invalid IP and look at the output in the terminal.
The ipaddress module is not actually validating our IP address. It’s attempting to use the provided string to create a Python IP address object. To use this logic to validate an IP, we need to create our own IP validation function.
The ipaddress module works for IPv6 addresses as well as IPv4 addresses:
Validate an IP Using Python and Regex
Another way to validate an IP address is by using your own custom regex to check the shape of the provided IP string. Python provides a library called re for parsing and matching Regex.
This method is less robust that using the ipaddress module, and requires more code on our end to check that the string is not only the right shape, but that the values in it are between 0 and 255. You’ll also need two write two separate functions to check an IPv4 address vs an IPv6 address, as IPv6 addresses have a difference shape.
In this tutorial, we’ll cover IPv4.
First, we’ll create a Regex string that matches an IPv4 address. There are a few ways to write this, but a nice, clear way to do it is the following:
Let’s break down the components of this expression.
The first group of characters indicates that we’re looking for a numeric character between 0 and 9
Next, the numbers between the curly braces tell the Regex parser that we’re looking for as few as one or as many as three instances of the previous character set. Since our previous character set was a number from 0 to 9, this tells the parser that we’re looking for a set of 1-3 numeric characters.
This tells the parser to look for the . character. In Regex, the . character is a special character that means “any character.” We have to escape the . with a backslash to tell the parser that we’re looking for a literal . and not “any character.”
Those three components make up one byte of an IP address (for example, 192.) Now, we simply repeat this string four times (omitting the final period.)
To use our Regex string, we need to import the Python re module. Next, we’ll use the .match() method from the module to match a string input against our Regex expression.
If the string is a match, re will use it to create a Match object with information about the span of the match, and the string that was matched. Since we don’t need all that info, we’ll cast the response to a boolean.
This is fine, but what if the user inputs a string that includes a 3-digit number greater than 255? Currently, our Regex matcher would return True even though that is not a valid IPv4 address. So we need to do one other check on our string to make sure that all of the numbers in it are between 0 and 255.
Here’s what our complete validation function using Regex looks like with that check included:
How to Find a User’s Location Using AbstractAPI's IP Geolocation API
Once you’re sure you have a valid IP address, you can use that IP address to determine the user’s geographical location. This is useful for doing things like serving assets in the correct language, verifying that a user’s request is not fraudulent, and showing the user’s location on a map.
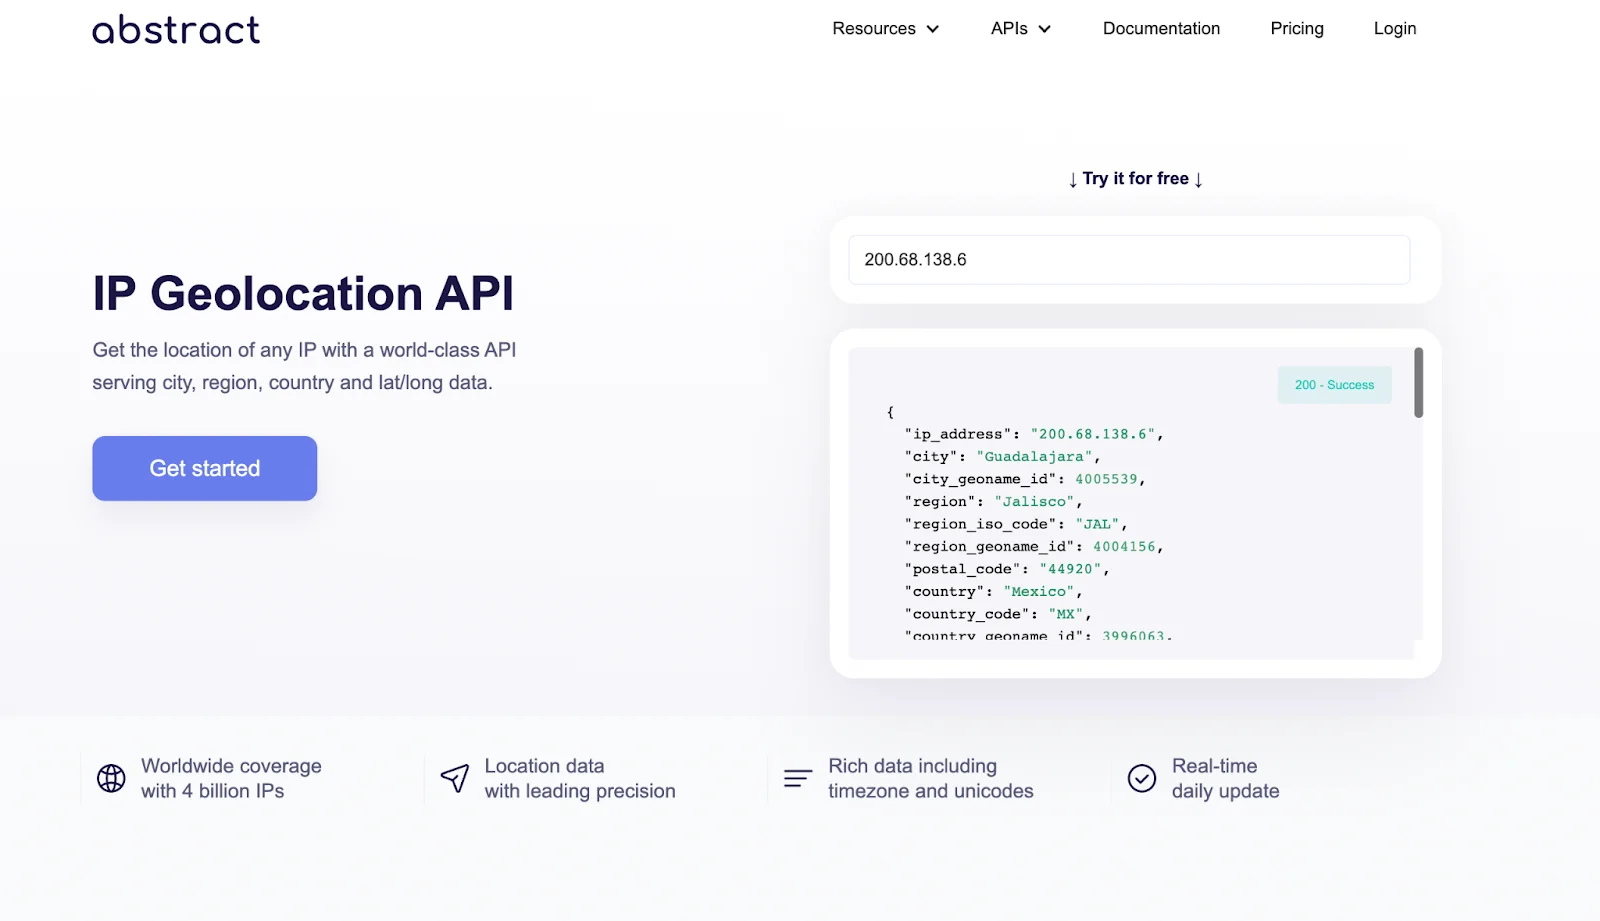
To find out the user’s geolocation from their IP, we’ll use the AbstractAPI IP Geolocation API. This simple REST API accepts an IP address string and returns a JSON object with information about the IP address, including location, device information, carrier information and more.
Getting Started With the API
Acquire an API Key
- Navigate to the API documentation page. You’ll see an example of the API’s JSON response object to the right, and a blue “Get Started” button to the left.

- Click the “Get Started” button. If you’ve never used AbstractAPI before, Yyu’ll be taken to a page where you’re asked to input your email and create a password. If you have used Abstract before, you may be asked to log in.
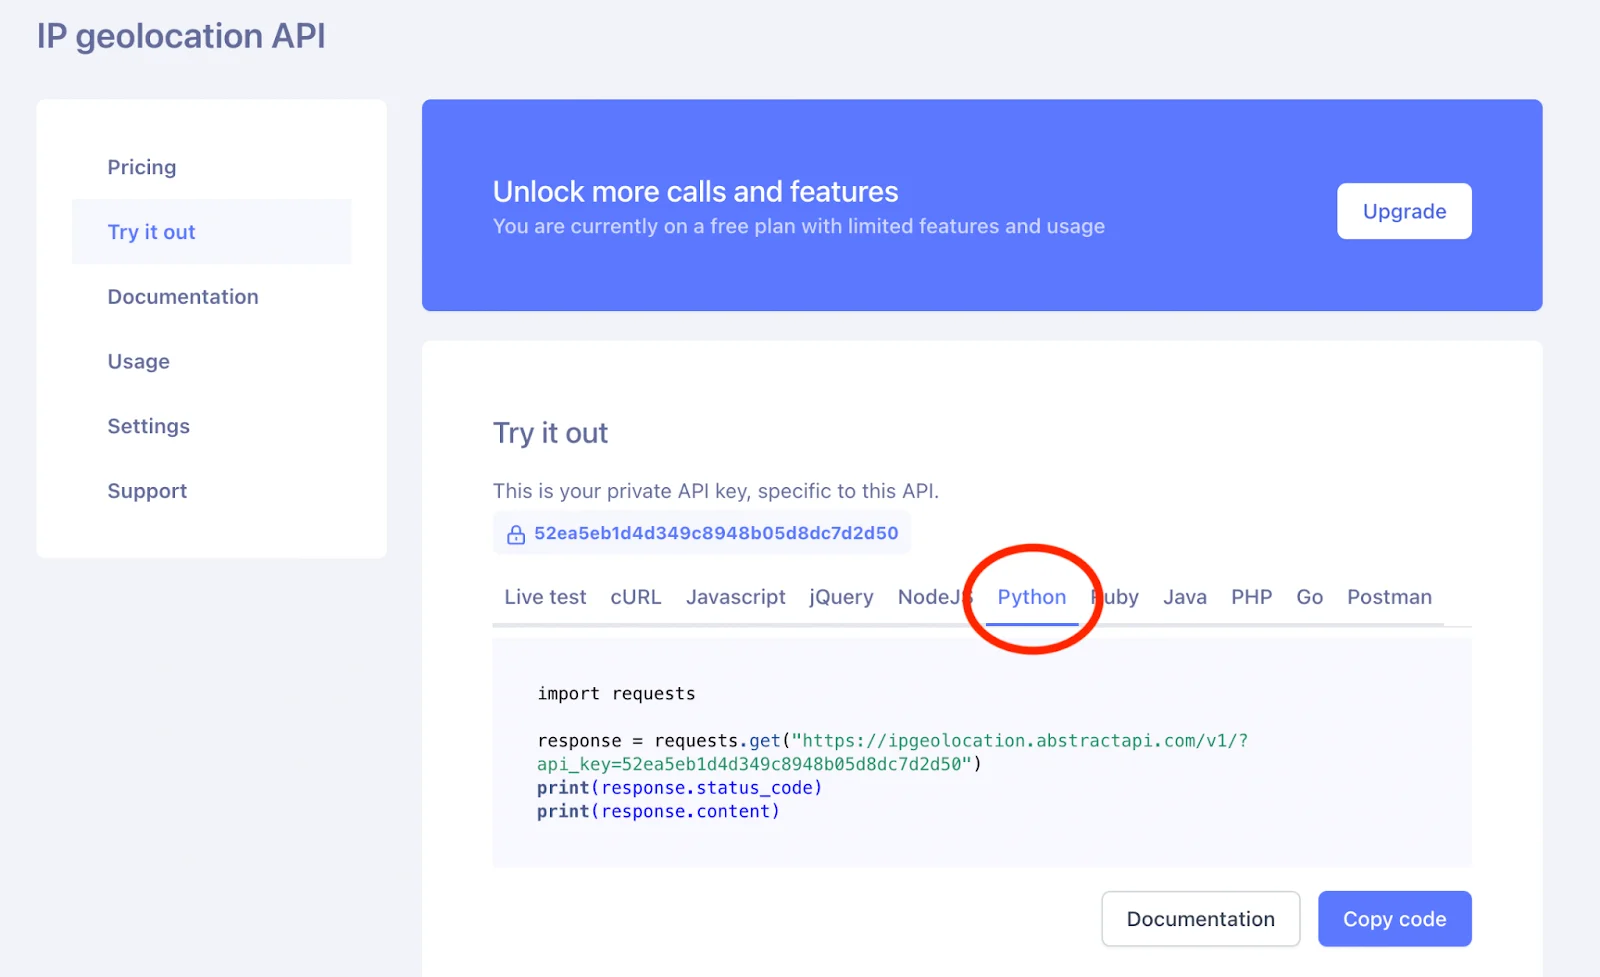
- Once you’ve signed up or logged in, you’ll land on the API’s homepage where you should see options for documentation, pricing and support, along with your API key and tabs to view test code for supported languages.
Making an IP Geolocation Request With Python
Your API key is all you need to get geolocation information for an IP address. AbstractAPI provides some example code in several languages to get you started. Plugging the code to make the request into our python app is simple. Let’s add a new function to take the IP address we just validated, and send it to the API.
- Select the “Python” tab on the AbstractAPI Geolocation API tester page. You’ll see a code snippet in the text box.

- Copy the code snippet and paste it into a new function called get_geolocation_info. This will be where we handle the logic for sending and receiving our requests to AbstractAPI.
Here, we use the Python requests library to send a GET request to the AbstractAPI Geolocation API url, including our API key and the IP address as querystring parameters. When the JSON response comes back, we simply print the content, but in a real app you would access the response object fields and use the information in your app.
Let’s clean up the function a bit to come in line with best practices.
The response that AbstractAPI sends (which is printed when we call print(response.content) looks like this:
Note: identifying information has been redacted.
Now we can write a single function that uses our Regex validation function to validate the IP and then sends it to the Geolocation API using our geolocation request function.
Conclusion
In this article, we learned what an IP address is, the difference between IPv4 and IPv6 addresses, how to validate an IP address using the Python ipaddress module and using Regex, and how to get geolocation info for an IP address using the AbstractAPI Geolocation API.
FAQs
How do I find my IP address?
You can easily view your current IP address by visiting https://whatismyipaddress.com/. This site gives clear information about your device’s current IP address, as well as fairly accurate geolocation information.
Your device Settings should also tell you your IP address. On a Macbook, open System Preferences > Network > Select either WiFi or Ethernet, depending on your connection. Your IP address will be displayed next to the list of network preferences.
Similar steps for finding your IP address on a smartphone or laptop can be found by googling.
How do I determine a location from an IP address?
There are several ways to find a user’s location from their IP address. The easiest way is to use a dedicated geolocation API, such as AbstractAPI’s IP Geolocation API. You can also look at the logs view of your web server if you have access to it. If you run a website and use Google Analytics 4 for SEO, for example, the Google Search Console gives you access to basic user location information like country and state.
Why should I care about my IP address?
Honestly, you don’t really need to. However, you should know that when you browse the internet, your IP address is used by apps and websites to get information about your device, location, and other things. Your IP address is just one way that sites have of tracking you. If you don’t want websites to be able to identify you, consider using a VPN to hide your IP information.


