Understanding Image Resolution
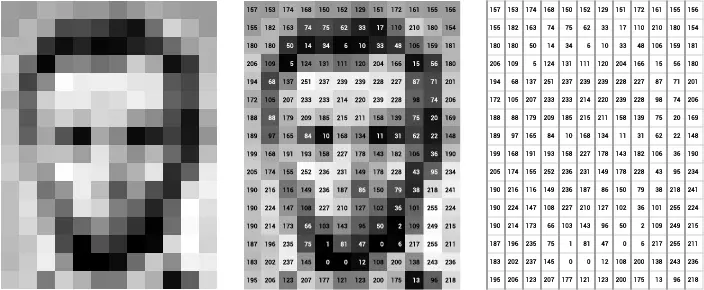
Image resolution refers to the density of pixels within an image. It is typically talked about in terms of PPI (Pixels Per Inch.) A higher PPI (i.e. more pixels per inch) will result in a higher-quality image. Low PPI results in a low-quality image.
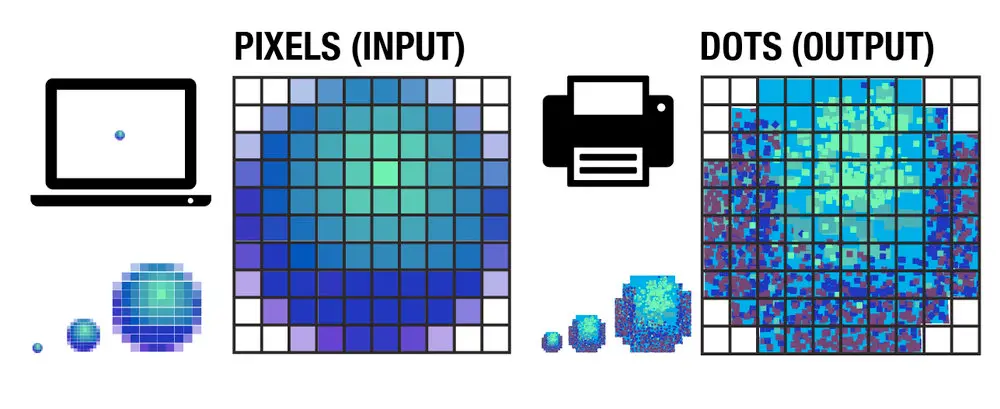
The standard display density for photos on the web is 72DPI. Anything higher than that is considered high quality. Anything lower is considered low quality.
You may also hear resolution talked about in terms of DPI (or Dots Per Inch.) This refers to the number of dots in one inch on an image that has been printed from a computer. This term is rarely used in the context of website images and is more commonly found in the photography world.
Choosing the Right Software for Resizing
There are many different software options available for resizing images without losing quality. The most popular ones are Adobe Photoshop, GIMP, Adobe Lightroom, and Corel PaintShop Pro. Each has its own advantages and drawbacks.
Adobe Photoshop is the industry-standard photo editing software. It is feature-rich and can do basically anything you want to do when it comes to photo manipulation. It is also expensive, and most certainly overkill for the casual user simply looking for an image resizer.
Adobe Lightroom is a scaled-down version of Photoshop that is cheaper but still quite pricey. It can do most of what Photoshop can do and is great for even professional photographers. Again, for simply resizing images, it is unnecessary.
GIMP is a free tool available to download for Windows, Linux, and Mac. It is open source, meaning you can edit the code yourself and distribute your own changes. It's a powerful free option for those looking for both basic and intermediate image editing functionality.

Corel PaintShop Pro is much cheaper than Photoshop or Lightroom and provides much of the same functionality as Lightroom. However, for simple image resizing, it's not necessary. A free online tool or GIMP will do everything you need.

Resizing Techniques for Retaining Image Quality
There are many different methods for resizing digital images without losing quality. Too many, in fact, to go into in great detail within this article. Let's take a look at a few of the most commonly found techniques and algorithms, to better understand how each technique affects image size and image quality.
Nearest Neighbor Interpolation
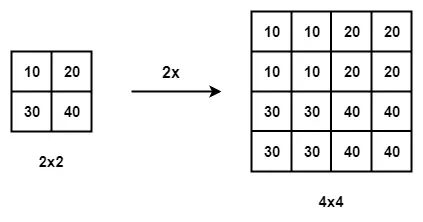
One of the easiest ways to enlarge photos is through nearest-neighbor interpolation. In this technique, every pixel in the input image is replaced with the nearest pixel in the enlarged image. This means multiple pixels of the same color will be present. This preserves sharp detail in digital art but can introduce jaggedness in smooth images like photos.
Bilinear and Bicubic Algorithms
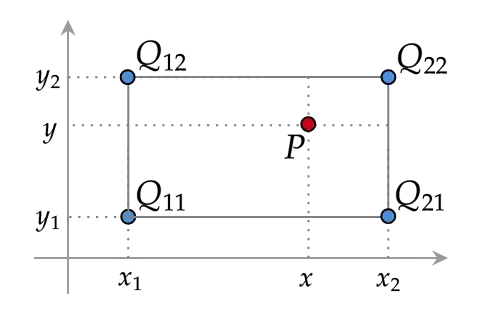
Bilinear interpolation interpolates pixel color values, meaning a continuous transition between pixels is seen in the resized image even if the input image had hard transitions. This is preferable for smooth images like photos, but not for pixel images like logos and digital art.
Bicubic interpolation is a similar process that outputs better results, with a higher computational cost.
Box Sampling
In the box sampling method, a single pixel in the input image is considered a box, and all pixels within that box are sampled. This means all input pixels necessarily contribute to the final image, which can prevent data loss and 'rough edges' that may be seen with bilinear, bicubic and similar algorithms.
The drawback of this algorithm is that it is difficult to optimize.
Best Practices for Resizing Images Without Losing Quality
In general, if you want to do image resizing successfully without losing quality, there are a few best practices you should adhere to. Let's take a look at a few of those best practices now.
Backup Original Image
This should go without saying, but always back up your images before doing any optimization or manipulation on them, particularly if you are using lossy compression or changing the file size.
Backup your images in multiple places, including in an online cloud storage repository.
Use Correct File Formats
Most people are familiar with the common image file formats: JPEG, PNG, GIF, BMP, SVG, and TIFF. However, they may not know how file size and image quality are affected by different formats.
JPEG, TIFF, GIF, and PNG files are raster files. They use square/rectangular pixels to represent images. SVGs and PDFs are vector files. They use points and polygons to represent images.
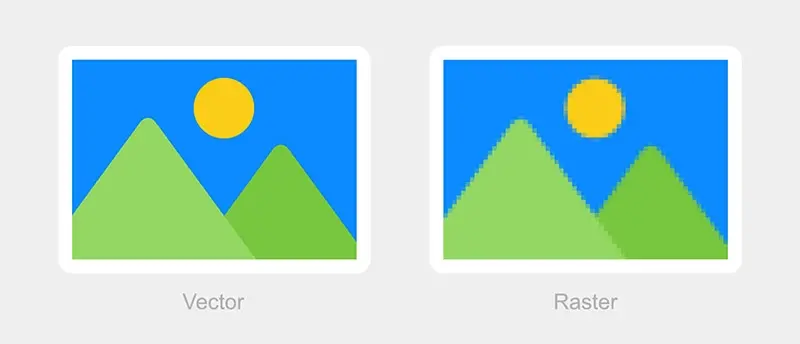
In general, JPEG, TIFF, GIF, and PNG file formats are best for smooth images with lots of information, like photos. SVG and PDF files are better for pixel images like digital art, logos, etc.
When resizing images of the raster type, Bilinear, and Bicubic algorithms are best. For vector resizing, the nearest neighbor or box sampling performs better.
Understand the Requirements Before Resizing
Make sure you know exactly how big an image needs to be on every device it will be displayed on, and make the image as big as it needs to be and no bigger. Mobile devices need to load smaller images, while desktops can load larger image files.
You need to optimize images for both environments and load the appropriate file size for the appropriate device.
How AbstractAPI's Image Optimization API Can Help...
AbstractAPI provides a completely free endpoint for compressing and resizing images without losing quality. This service is aimed at web developers and coders who need a code solution to resize images in their app or website, however, it can also be used by casual users.
There is a paid and free version of the API. The free version allows up to 100MB of uploads per month and is free for life.
Let's take a look at how to resize images using AbstractAPI.
How to Resize an Image Using AbstractAPI
First, go to the API Homepage. If you've never used AbstractAPI before you may need to sign up for a free account with your email and a password. Once you've done that, click the blue Get Started button to be taken to the Image Processing and Optimization API.
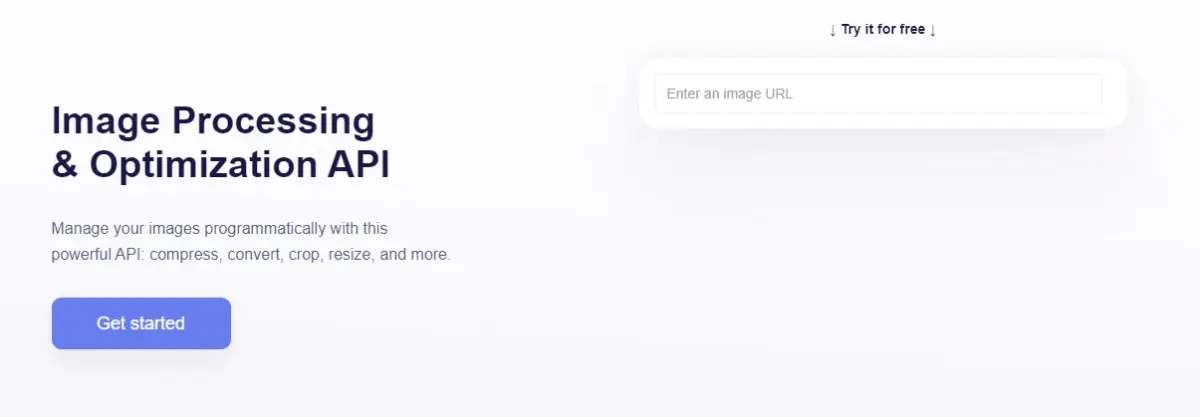
Here, you'll see your API key, plus links to documentation, pricing, support, and other services.
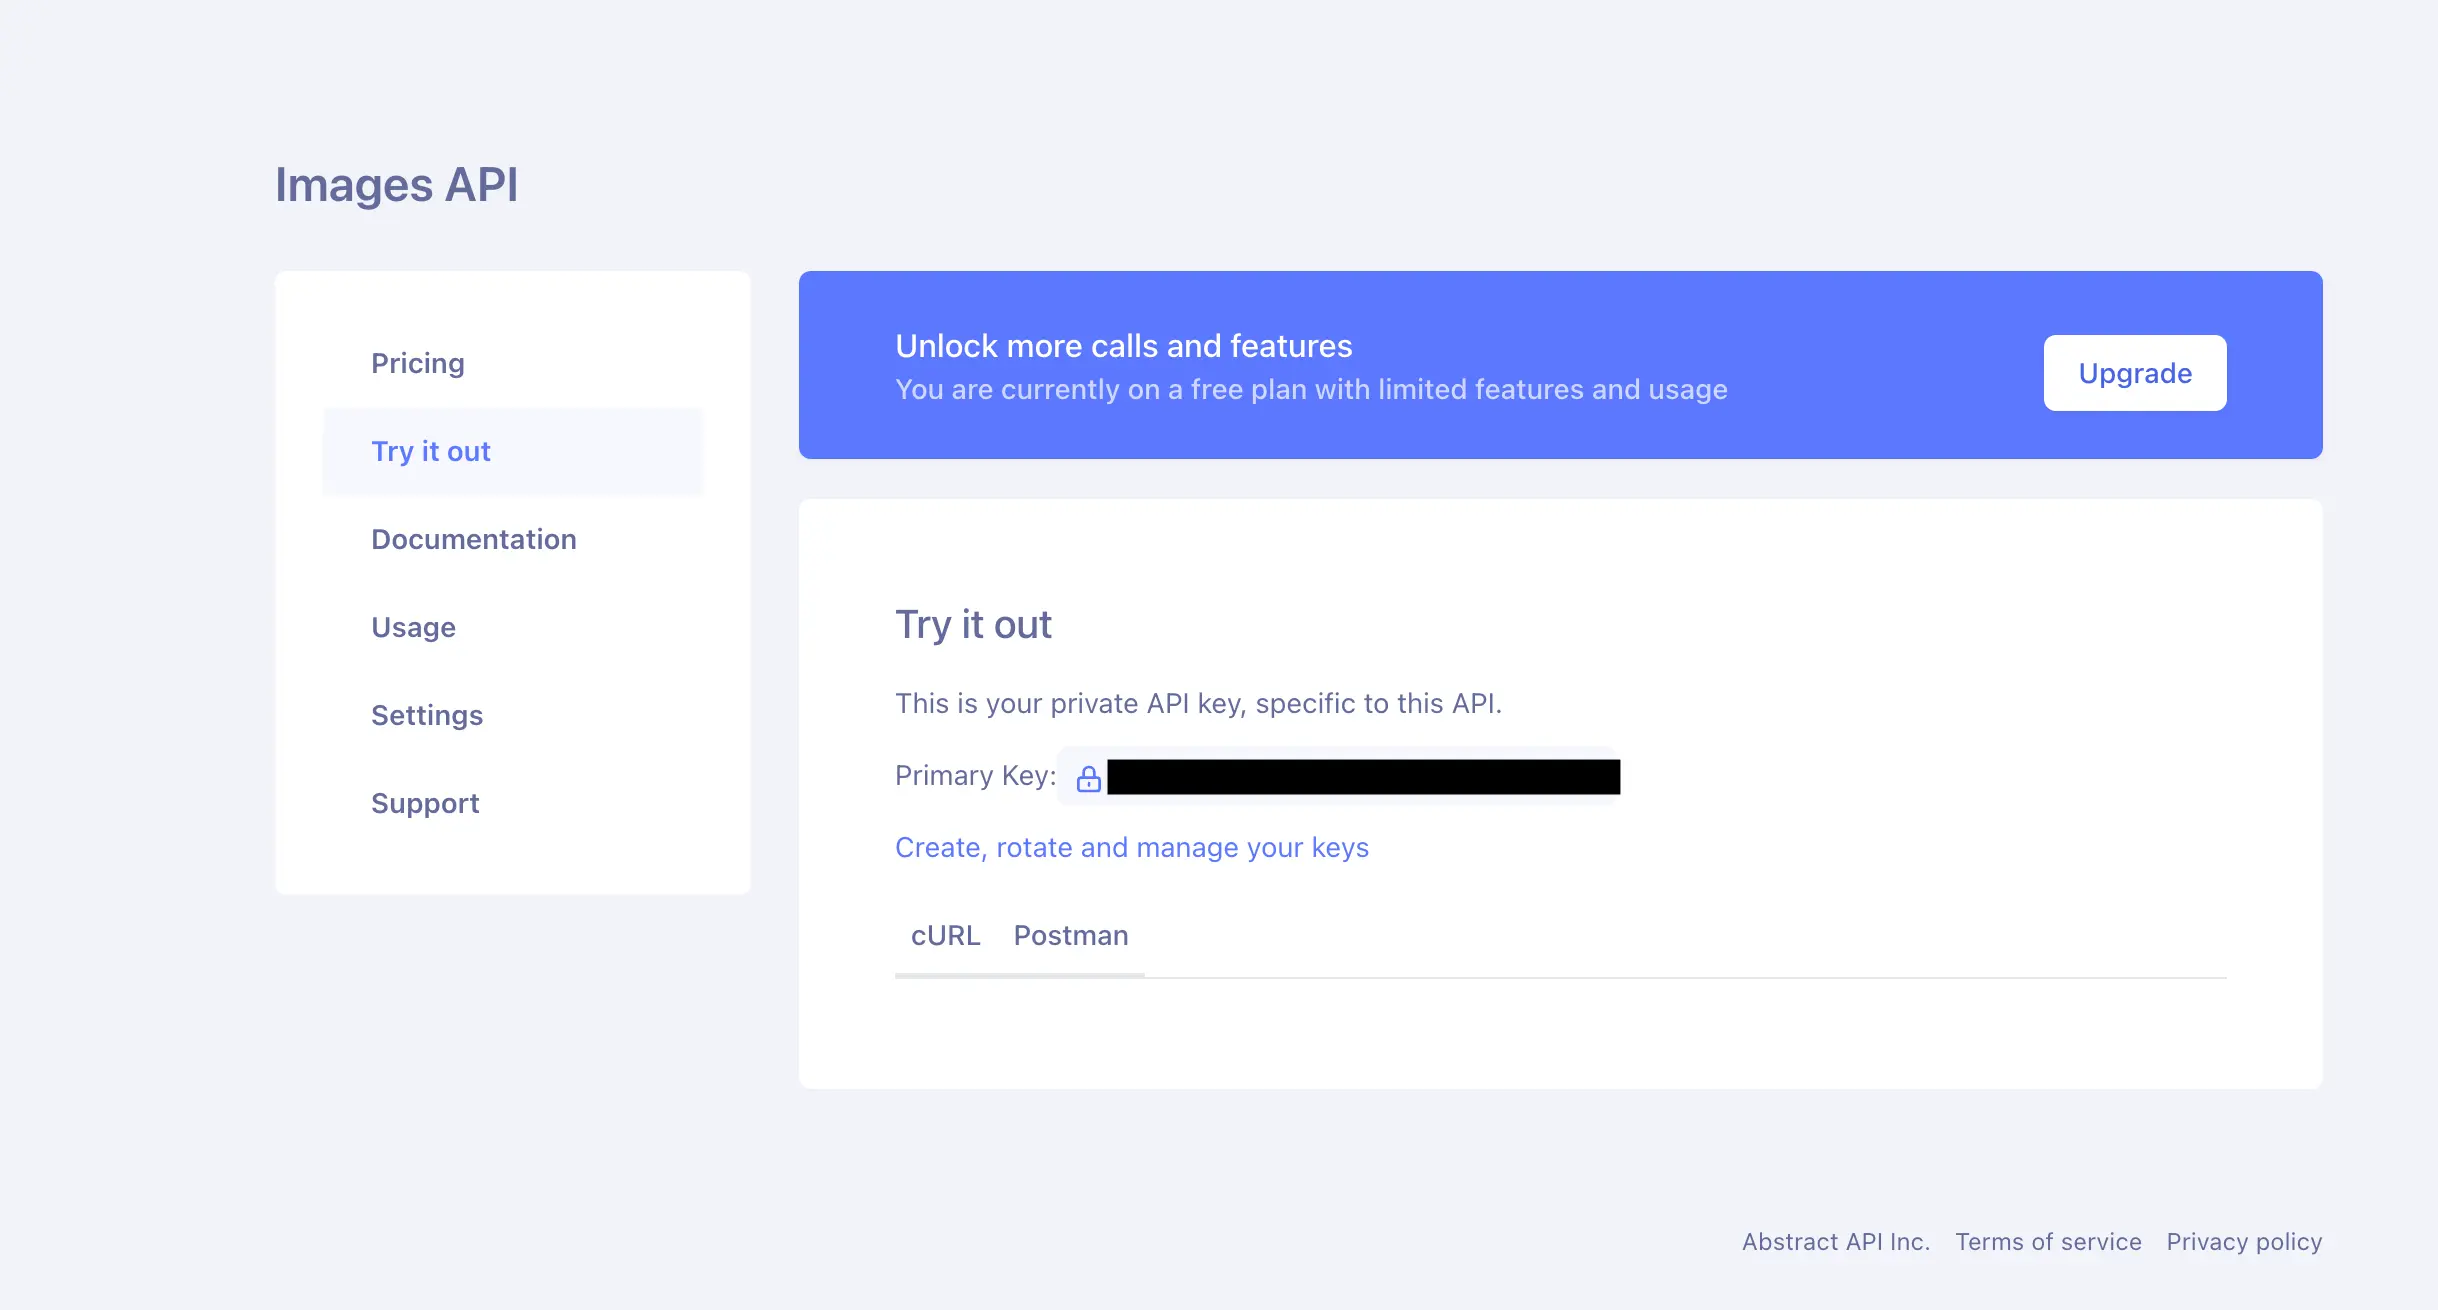
Abstract provides two endpoints for image resizing: a multipart form upload endpoint for sending image files and multiple images; and a POST endpoint that accepts a data object with a URL to a hosted image.
We'll send a request to resize the following test image, hosted at this URL: https://s3.amazonaws.com/static.abstractapi.com/test-images/dog.jpg

The data object you send should look like this:
Next to the URL field in your data object, include a resize field. This should contain an object with your desired resize options. Check the documentation for resizing options. You can specify specific width/height values, or use other methods to shrink or enlarge the image.
The response you get from the API will look like this:
This is a JSON object containing information about both the original image and the resized image. There is a URL that links to the resized image, which is hosted in an S3 bucket provided by AbstractAPI.
Conclusion
It's critical to maintain image quality when resizing images for the web. Doing so will ensure a smooth and high-quality user experience for every person who visits your site. Follow the best practices outlined in this article, and you should be able to successfully resize images without losing quality, every time.\


